 Save
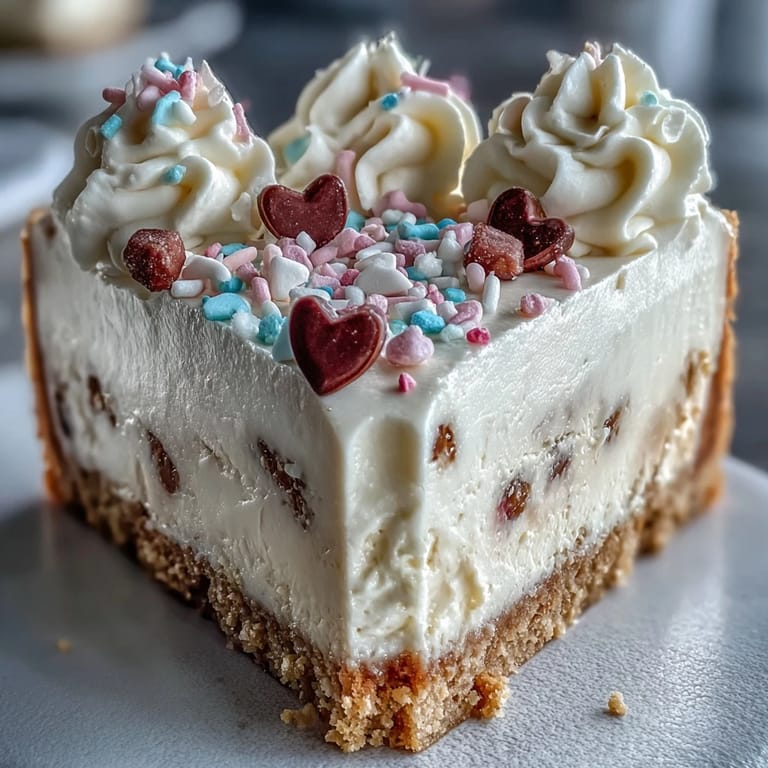
Save The first time I attempted a no-bake cake, I was genuinely skeptical that something so effortless could taste anything like the real deal. But then I took that first bite—creamy, light, and utterly indulgent—and I was completely converted. Now this candy hearts version has become my go-to for celebrations when I want something show-stopping but won't keep me tethered to the oven all afternoon.
I made this for my niece's Valentine's birthday last year, and honestly, the way her face lit up when she saw those candy hearts embedded in the frosting was worth every minute of prep time. The best part was telling everyone it was no-bake and watching the room full of busy parents practically tackle me for the recipe.
Ingredients
- Graham cracker crumbs: These create that classic buttery crunch that contrasts perfectly with the silky filling—pulse whole crackers in a food processor for the most consistent texture
- Unsalted butter: Melted butter binds the crust together; using unsalted lets you control the sodium level
- Cream cheese: The backbone of the filling, so bring it to room temperature for at least two hours to prevent any lumpy situations
- Heavy whipping cream: Cold cream is nonnegotiable here—chill your bowl and whisk too for the best volume
- Powdered sugar: Sifting first might feel like an extra step, but it saves you from those frustrating tiny sugar clumps in your otherwise smooth filling
- Pure vanilla extract: Don't skimp here—real vanilla makes such a difference in something this simple
- Pink gel food coloring: Gel coloring is more concentrated than liquid, so start with a tiny amount and build up
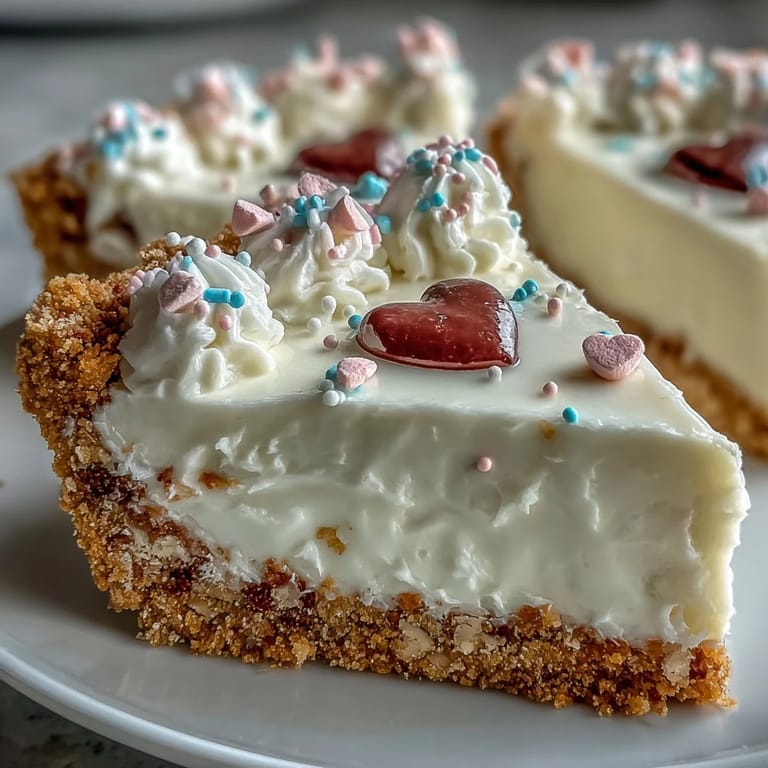
- Conversation heart candies: Press these in gently but firmly—too light and they'll slide off, too aggressive and you'll crack your beautiful frosting
- Rainbow sprinkles: These add that final festive touch that makes everyone smile before they even take a bite
Instructions
- Build the buttery foundation:
- Mix graham cracker crumbs, melted butter, and granulated sugar until the texture resembles wet sand that clumps together when pressed between your fingers
- Press and chill:
- Firmly pack the crust mixture into the bottom of a parchment-lined springform pan, using the bottom of a measuring cup to create an even, compact layer, then refrigerate for 15 minutes
- Whip up the creamy filling:
- Beat softened cream cheese until completely smooth, then incorporate sifted powdered sugar and vanilla until fluffy
- Fold in the clouds:
- In a separate chilled bowl, whip cold heavy cream to stiff peaks, then gently fold it into the cream cheese mixture until no streaks remain
- Create the silky layer:
- Spread the cheesecake filling evenly over your chilled crust, smooth the top with an offset spatula, and refrigerate for at least 4 hours or overnight
- Whip the pink frosting:
- In a clean chilled bowl, whip the remaining heavy cream with powdered sugar and vanilla to stiff peaks, then add pink food coloring one drop at a time until you reach your desired shade
- Frost and decorate:
- Release the chilled cake from the pan, spread whipped frosting evenly over top and sides, then press conversation hearts into the sides and add sprinkles on top
- Final chill:
- Refrigerate the decorated cake for 30 minutes to set everything before slicing
 Save
Save My sister-in-law jokingly calls this the celebration cake because it's appeared at every family gathering since I first made it. There's something about those candy hearts that makes even the most serious adults grin like little kids again.
Make Ahead Magic
The entire cake can be prepared up to two days in advance, though I recommend adding the candy hearts and sprinkles no more than 24 hours before serving to maintain their crunch. Store it loosely covered in the refrigerator—the moisture from the fridge can make the candies slightly soft if left too long.
Serving Suggestions
This cake tastes best when served chilled, straight from the refrigerator. I love pairing it with something slightly tart to cut through all that creamy sweetness, like fresh berries or a squeeze of citrus over each slice.
Decoration Beyond Hearts
The beauty of this recipe lies in its adaptability for any occasion throughout the year. Switch up the colors and decorations to match holidays, birthdays, or seasonal themes.
- Crushed peppermint candies and white sprinkles for winter holidays
- Edible flowers and pastel pearls for spring celebrations
- Chocolate sandwich cookies and colorful chocolate candies for everyday indulgence
 Save
Save Every slice of this whimsical creation reminds me that the best desserts aren't just about taste—they're about the joy they bring to the table. Happy baking, and may your celebrations always be sweet.